Press-On Nails: Fit, Application and Careful Removal
Three stages decide how press-ons look and what they leave behind: sizing each finger, applying with tabs or glue, and soaking them off without prying.

A set of press-on nails goes on in about twenty minutes and comes off the same week, which makes it the most temporary way to wear length, a shape or a design that your own nails are not currently doing. How good they look, how long they stay and what state your nails are in afterward come down to three stages: getting the fit right, applying them with care, and taking them off patiently.
Stage one: fit
Fit is decided before any adhesive is opened. A nail that is the wrong width will lift at the sides or press on the skin, and no amount of glue corrects that.
Size every finger
Most sets include ten or more sizes, usually numbered on the underside or the tab. Hold each one over the matching nail, unglued, and check three things:
- Width. The press-on should cover your nail from side wall to side wall without resting on the skin. If you are between sizes, choose the smaller one, or the larger one filed down at the sides. A nail that overlaps the skin lifts quickly and is uncomfortable.
- Curve. Press lightly in the center. It should sit flat against your nail without rocking and without a visible gap at the sides. Flatter natural nails suit flatter press-ons.
- Base. The cuticle end should follow the curve of your own cuticle line, sitting just in front of the skin, not on it.
The same finger can take a different size on each hand. Lay the chosen nails out in order before you start.
Adjust before you stick
Press-ons can be filed like natural nails. Narrow the sides with a few strokes if needed, round the cuticle edge to match yours, and shorten or reshape the tips now; it is far easier than filing them on your hand. If length is new to you, start short. Our guide to choosing a nail shape for everyday wear can help you decide what your week will tolerate.
Choose the adhesive for the occasion
| Adhesive tabs | Nail glue | |
|---|---|---|
| What they are | Thin double-sided stickers shaped to the nail | Liquid adhesive, applied by brush or nozzle |
| Wear | Shorter; suited to an evening or a weekend | Longer; often a week or more, depending on the product and your routine |
| Removal | Easier | Takes a soak and more patience |
Stage two: application
Prepare the nail
- Remove any polish and wash your hands. Dry them thoroughly.
- Trim your own nails short and file the edges smooth, in one direction.
- Leave your cuticles as they are. The American Academy of Dermatology advises against cutting cuticles or pushing them back forcefully. If skin has grown onto the nail and you want it out of the way, ease it back gently after a shower.
- Wipe each nail with the alcohol pad from the set, or with polish remover, to take off any oil. Skip hand cream until you have finished.
Some instructions suggest roughing up the nail surface with a buffer. Keep this very light or leave it out; every pass of a buffer takes away a little of the nail’s surface.
Apply
Work one nail at a time, little finger first and thumbs last.
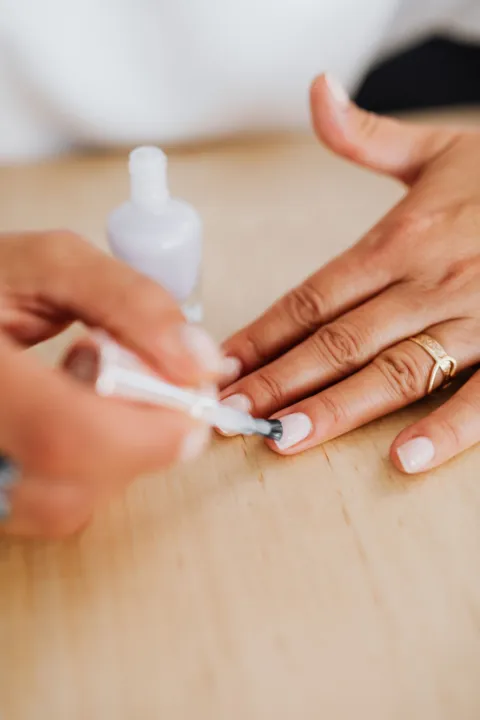
- Adhesive. For tabs, press the tab onto your nail, smooth it down and peel off the film. For glue, apply a thin layer to your nail and a small drop to the underside of the press-on. Use less than you think: glue that squeezes out onto the skin is the thing to avoid.
- Placement. Hold the press-on at about a 45-degree angle, set its cuticle end just in front of your cuticle, then lower it toward the tip. This pushes air out ahead of it.
- Pressure. Press firmly in the center, then along both sides, and hold for the time stated on the pack, often 20 to 30 seconds.
- Check. Look at the nail from the fingertip end to see that it sits straight. Glue gives you a few seconds to adjust; after that, leave it.
If glue reaches your skin, wipe it away at once with a wooden stick or a cotton swab. Keep hands out of water for an hour or two afterward so the bond can set.
While you wear them
- Use the pads of your fingers, not the tips, for buttons, cans and phone screens.
- Wear gloves for washing-up; long soaks loosen the bond.
- If a nail loosens, take it off, clean and dry your own nail, and reapply. Do not add glue over a gap, where water can sit.
The AAD’s general view of artificial nails is that healthy nails tolerate them when they are kept for occasions and not worn continuously, and that they should not be used to cover up a nail that is already unwell.
Never lever a nail up from the tip or the cuticle end, and never peel one off dry.
Stage three: careful removal
Pulling or prying a glued nail off is hard on the nail underneath. Plan fifteen to twenty unhurried minutes instead.
Start with the pack
Read the removal instructions for your set; adhesives differ, and the maker knows which solvent theirs responds to. The general method below suits most tab and many glue applications.
The soak method
- Fill a bowl with comfortably warm water, a little soap and a few drops of any skin-safe oil.
- Soak your fingertips for ten to fifteen minutes.
- Test one nail at its side edge with a wooden stick or the pad of a finger. If it gives, rock it gently from side to side and let it slide away.
- If it resists, stop. Work a drop of oil under the edge and return to the bowl for another five to ten minutes. Repeat as often as it takes.
- Roll any remaining adhesive off with the pad of a finger, or wipe it with remover on a cotton pad. Do not scrape it with metal.
Never lever a nail up from the tip or the cuticle end, and never peel one off dry.
If the pack calls for acetone
Some glues only release with an acetone-based remover. If your set’s instructions say so, follow them, and borrow two precautions from the AAD’s advice on acetone: put petroleum jelly on the skin around the nails first, and keep the acetone on the nail, not the whole fingertip.
Afterward
Wash your hands, file away any roughness and work hand cream or oil into the nails and surrounding skin. The AAD recommends moisturizing after any remover, which is drying. Then give your nails a few days bare, or with only a clear coat, before the next set; the steps are in our beginner-friendly at-home manicure.
When to stop
Take the nails off, using the soak, and leave your nails bare if you notice redness, itching, swelling or soreness around the nails, or a nail starting to lift from the skin underneath. DermNet points out that reactions to nail products often appear away from the fingers, for instance on the eyelids or neck, so an unexplained itchy patch there counts too. If it does not clear, or the nail itself looks changed, see a doctor or dermatologist and mention what you were wearing.
Sources
- DermNet Nail cosmetics allergy
- DermNet Allergy to acrylates
- U.S. Food and Drug Administration Nail Care Products | FDA
- American Academy of Dermatology Manicure and pedicure safety
- American Academy of Dermatology Artificial nails: Dermatologists' tips for reducing nail damage
- American Academy of Dermatology Dermatologist's secret for removing gel nail polish at home
Researched and written by Dates Force Editorial with AI assistance, from the published sources listed above — not from product testing. This is general information about everyday cosmetic care, not medical advice. How we work · Report an error
Part of The Weekend Edit
Keep reading
How to Choose a Nail Shape for Everyday Wear
Round, squoval, square, oval or almond: pick by what your hands do all week, then by the nail you already have.